

5 Creative Ways to Hang Frames Without Nails
Table of Contents
- Why Nail-Free Hanging Is Worth Learning
- Method 1: Adhesive Strips and Mounting Tape
- Woman in White Suit Art Print Matte Canvas, Framed | Glamorous Fashion Portrait
- Method 2: Velcro-Style Hook and Loop Fasteners
- Method 3: Picture Ledges and Floating Shelves
- Method 4: Tension Rods and Over-the-Door Hooks
- Method 5: Removable Adhesive Hooks and Clips
- How to Arrange Art Frames for a Gallery Wall
- Best Adhesive Strips for Gallery Walls
- Frequently Asked Questions
Last Updated: October 4, 2026
Why Nail-Free Hanging Is Worth Learning
Renters and design-conscious homeowners now have more options than ever to hang frames without nails.
Nail-free hanging is the practice of securing framed art using adhesive strips, mounting tape, hook-and-loop fasteners, ledges, or tension rods instead of hammered hardware. It protects your wall surface, keeps your deposit intact, and still delivers a polished gallery wall.
The trade-off is weight. Most damage-free methods cap out well below what a single nail can hold, so matching the method to the frame weight matters more than any other decision.
Method 1: Adhesive Strips and Mounting Tape
Adhesive strips are the go-to solution for light to medium frames on smooth, painted walls. They use a stretch-release adhesive backing that grips cleanly and pulls away without residue when you're ready to move things around.
For best results, clean the wall with rubbing alcohol, let it dry completely, then press the strip firmly for 30 seconds. Wait an hour before hanging the frame so the bond can set.
Weight Limits and Surface Prep for Adhesive Strips
Weight capacity is the deciding factor here, and it's where most guides stay vague. As a working rule of thumb that most practitioners follow: a single small strip handles a light frame (roughly the weight of a paperback), a pair of medium strips handles a standard 8x10 in a light frame, and larger strips or doubled-up pairs are needed once you move into heavier pieces. Always check the strip's stated limit and stay comfortably under it, a common pattern is to target no more than about two-thirds of the rated capacity so the bond has margin.
Surface preparation is equally important, and it's surface-specific:
- Smooth painted drywall or plaster: the ideal surface. Wipe with rubbing alcohol, let it dry, press firmly.
- Glossy or semi-gloss paint: adhesion is weaker because the strip can't key into the surface. Clean thoroughly and consider a light scuff with a clean cloth.
- Fresh paint: wait at least a week before applying strips so the paint fully cures. Applying too early can pull paint off on removal.
- Textured walls, brick, or wallpaper: adhesive strips almost always fail here. The adhesive can't form a full bond across the texture, and the frame drops within days. Skip strips entirely and use a ledge or tension rod instead.
- Dusty or greasy surfaces (kitchens, garages): clean first, or the strip bonds to the dust, not the wall.
How Many Strips Do You Actually Need?
The number of strips matters more than the brand. A simple rule of thumb: use one strip per corner of the frame for light pieces, and add a strip along the bottom edge for medium pieces so the frame can't swing.
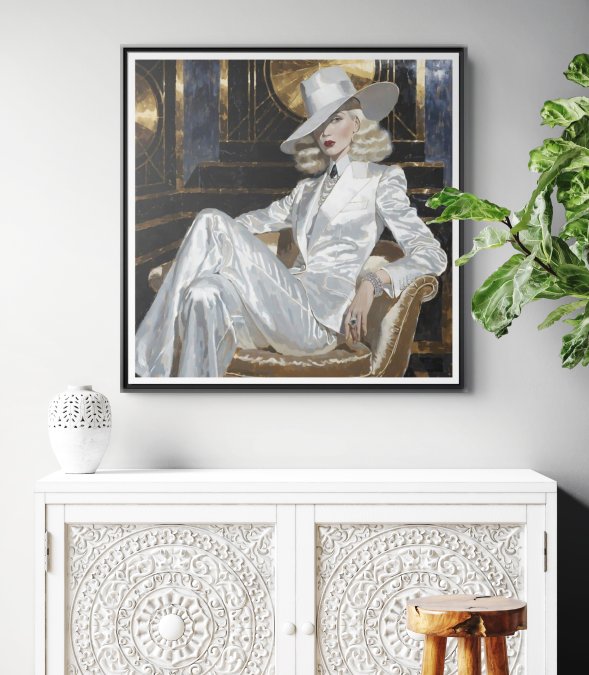
Woman in White Suit Art Print Matte Canvas, Framed | Glamorous Fashion Portrait
Method 2: Velcro-Style Hook and Loop Fasteners
Hook and loop fasteners, often called Velcro-style strips, let you reposition frames repeatedly without reapplying adhesive. One side sticks to the wall, the other to the frame, and the two interlock.
This method shines for gallery walls you plan to rearrange. You can swap art seasonally without touching the wall surface. The catch: hook and loop fasteners hold less weight than a solid adhesive strip of the same size, so they suit lighter frames best.
For renters who like to change things up, this is one of the most forgiving temporary mounting options available.
Method 3: Picture Ledges and Floating Shelves
Picture ledges solve the weight problem entirely because the frame rests on a surface instead of hanging from it.
Floating shelves work the same way and double as display space for small decor. The trade-off is that ledges require drilling, so they aren't truly damage-free, but they leave only a couple of small holes instead of many.
Ledges also make gallery wall layout easy. You can slide frames left and right until the arrangement looks right, no measuring required.
Method 4: Tension Rods and Over-the-Door Hooks
Tension rods and over-the-door hooks need zero wall contact, which makes them the safest option for anyone who can't touch the wall at all. A tension rod wedges between two surfaces, and an over-the-door hook slips over the top of a door.
Use these for lightweight frames in doorways, closets, or between two cabinets. They work well for displaying small prints on ribbon or twine. The limitation is size: tension rods only fit specific widths, and over-the-door hooks only suit doors. Both handle light loads, so keep frames small.
Method 5: Removable Adhesive Hooks and Clips
Removable adhesive hooks and clips are the simplest single-frame solution. Press the hook onto a clean wall, wait for the adhesive to set, and hang. Clips work for unframed prints or lightweight canvases.
These are ideal for small, lightweight pieces and quick swaps. The adhesive backing on most hooks is designed to release cleanly when you pull the tab slowly. Pull straight down, not out, to avoid tearing paint. For heavier frames, use two hooks spaced apart for balance.
Removing Adhesive Hooks Without Losing Your Deposit
This is the part most guides skip, and it's the part renters actually care about. The good news: done correctly, adhesive hooks and strips come off without a trace. Done carelessly, they take a patch of paint with them.
Follow this sequence:
- Warm the adhesive first. A hair dryer on low, held a few inches from the hook for 20-30 seconds, softens the bond and makes it release far more cleanly. This single step prevents most paint damage.
- Pull the tab straight down, slowly. Don't yank, and don't pull outward. The stretch-release adhesive is designed to elongate and let go when pulled parallel to the wall. Pull at a steady pace, a slow, long stretch beats a fast tug every time.
- Support the frame as you go. Have one hand on the frame so it doesn't drop when the bond releases.
- If the tab breaks or the hook won't budge, don't pry it with a tool. Warm it again, then work a length of dental floss or fishing line behind the adhesive in a sawing motion to slice the bond.
- Deal with residue gently. A small amount of sticky residue is normal. Roll it off with your thumb, or dab it with a little rubbing alcohol or a mild citrus cleaner on a cloth. Avoid scrubbing, which can dull the paint sheen.
What Actually Causes Wall Damage
Damage almost never comes from the adhesive itself, it comes from three avoidable mistakes:
- Applying to fresh or poorly cured paint. The adhesive bonds to the paint layer, and removal takes the paint with it. Wait at least a week after painting.
- Pulling outward instead of down. This is the single most common cause of torn drywall paper.
- Overloading the hook. When a hook is past its weight limit, it creeps down the wall slowly and can tear the surface on release. Stay under the rated capacity.
If you do tear the paint, a small patch of spackle and a color-matched touch-up usually restores the wall well enough to pass a move-out inspection.
How to Arrange Art Frames for a Gallery Wall
Arranging a gallery wall starts with laying every frame on the floor first. Move pieces around until the spacing and balance feel right before anything touches the wall.
Start with the largest or most dramatic piece as your anchor, then build outward. Keep the gaps between frames consistent, usually a few centimetres, so the group reads as one unit.
If you're unsure, trace each frame onto paper, tape the paper to the wall, and step back. Adjust until the layout works, then hang.
The 2/3 Rule and Spacing Basics
The 2/3 rule keeps gallery walls from looking cramped or lost. Aim for art to cover roughly two-thirds of the available wall width, and hang pieces so the center of the arrangement sits at eye level, around 145 to 150 centimetres from the floor.
Keep spacing between frames consistent, typically 5 to 8 centimetres. Consistent gaps matter more than perfect symmetry. A slightly off-center arrangement with even spacing looks better than a perfectly centered one with uneven gaps.
Best Adhesive Strips for Gallery Walls
The best adhesive strips for gallery walls are the ones rated for the combined weight of your frames, applied to a smooth, clean surface. Buy strips with a stated weight capacity and stay comfortably under it.
When building a gallery wall, use one strip system throughout for consistency. Mixing brands can lead to uneven adhesion and frames that sit at slightly different depths. For heavier anchor pieces, double up on strips or switch to a ledge.
A quick reference for matching method to frame:
Method |
Best For |
Wall Contact |
Weight Range |
|---|---|---|---|
Adhesive strips |
Light to medium frames |
Smooth painted walls |
Light to medium |
Hook and loop |
Frames you rearrange often |
Smooth painted walls |
Light |
Picture ledges |
Heavy frames, layered displays |
Requires drilling |
Any weight |
Tension rods |
Small frames, no-contact walls |
None |
Light |
Adhesive hooks |
Single small frames |
Smooth painted walls |
Light |
Once your wall is styled, the art itself does the heavy lifting. At LOLA VEGAS ART, our framed canvas prints arrive ready to hang, so you can move straight from layout to display. For a bold anchor piece, the green and gold marble abstract print brings contemporary color to a gallery wall, while the WOMAN IN WHITE SUIT WALL ART adds ART DECO energy.


Frequently Asked Questions
How do you hang a frame without hooks?
Adhesive strips, mounting tape, and hook-and-loop fasteners let you hang frames without hooks. Clean the wall with rubbing alcohol, let it dry, then press the adhesive firmly for 30 seconds. Wait an hour before hanging the frame. This works well for lightweight frames under 2 kilograms. For heavier pieces, use a picture ledge or removable adhesive hooks rated for the weight.
Are adhesive strips safe for all wall types?
No. Adhesive strips work best on smooth, painted surfaces like drywall, painted wood, and tile. They do not hold well on textured walls, brick, or masonry because the adhesive cannot make full contact. On these surfaces, try hook-and-loop fasteners with a larger backing or use a picture ledge instead. Always test a small strip in a hidden spot first.
What is the best way to create a gallery wall without damaging walls?
Lay your frames on the floor first and arrange them until the layout feels right. Use adhesive strips or hook-and-loop fasteners for each frame. For a damage-free look, mix in a picture ledge to hold a few frames and break up the grid. Keep heavier pieces low and lighter ones high. This approach keeps your wall integrity intact and works in rentals.
How do you hang heavy frames without nails?
For frames over 4 kilograms, use a picture ledge or floating shelf that distributes weight across the wall. Adhesive strips have weight limits, so check the packaging and never exceed it. Hook-and-loop fasteners can hold more than standard strips if applied to a clean, smooth surface. For very heavy pieces, a floor-standing easel or leaning against a ledge is the safest nail-free option.
What is the 2/3 rule for hanging pictures?
The 2/3 rule says art should take up about two-thirds of the wall width or the furniture below it. For example, if your sofa is 180 centimetres wide, your art arrangement should span roughly 120 centimetres. This proportion keeps the wall balanced. Center the art 145 to 152 centimetres from the floor for eye-level viewing.
Hanging art without nails comes down to one habit: weigh the frame, then match the method. When you're ready to fill those walls with pieces worth showing off, LOLA VEGAS ART offers original framed canvas art in sizes and finishes built for real rooms. Shop LOLA VEGAS ART and give your space the color it's been missing.